22 May Kitchen Organization in 6 Simple Steps
One of my favorite rooms in a home to organize is the kitchen. It’s densely packed with tons of gadgets, cooking appliances, utensils, and usually foods of all kinds all jammed into every inch of cabinet or drawer space (sometimes even all over the countertops). It has the most multi-category items in one place, next to a garage or basement. It’s always a fun puzzle trying to figure out how to make a kitchen as efficient and organized as possible, because no two kitchens are alike.
The kitchen is the heart of the modern home. It’s the place that everyone congregates, and often acts as a multipurpose room (a place to eat, a place to do homework, often times an office, a place to catch up, etc.). It’s no surprise that the trend has become to have a big open space kitchen that usually flows into a family room area – it’s because this is where people spend most of their time. It’s therefore also the room that accumulates the most clutter, which is why it’s crucial to have organizational systems in place to make sure it can get tidied in a jiff.
Here are 6 steps to an organized and efficient kitchen from a professional organizer’s point of view.
Step 1: Maximize Efficiency
Before you get organizing you have to consider a few key factors:
1. Who’s doing the cooking?
If one person, we may tailor the system to that person. If more than one person, we will need to take each person’s needs into consideration.
2. Height of people using the kitchen.
Will we need a step stool? Should we limit what we put too high or too low? Do we want toddlers to have access to their stuff (snacks, bowls/cups/plates) on their level?
3. Are the owners right handed or left handed?
This makes a difference for how we layout the kitchen (and other rooms like the bathroom).
4. What’s the layout of the kitchen and what kind of storage are we dealing with?
Do we have mostly cabinets, or drawers? Do we have a pantry?
5. Who are you? A chef? A baker? A griller?
This will help us determine where to place items you’ll be using the most often.
All of these factors play a part in making the kitchen as efficient as possible. People are always surprised to discover that organizing is a lot more mental than physical.
Step 2: Organize into Stations
First, set your kitchen up like a professional one.

Professional kitchens are organized into stations, around major appliances, where each item has a designated home. The term “mise-en-place” means “put in place” and this is a religion for most chefs. You can’t waste time looking for items or cleaning them, so make sure you clean the kitchen and put items away as you go (or at least after each meal). You may even think about some chefs and homemakers you know who already do this (my best friend does this).
Let’s use a practical example: if I handed you a fork, you’d know exactly where to put it right? It lives in the kitchen (the main room), in the drawer with the other silverware (sub category) with the other forks (specific location). Apply this fork example to any object to figure out where it makes the most sense to live (umbrella category first; sub category; specific category/location).
Note: Just because an item is generally known to reside in a specific place doesn’t mean it has to be located there if it doesn’t work for you.
The odd example I give to clients for this goes like this: Suppose you like to dry your hair while eating your cereal (to save on time in the morning). You can’t keep your milk and cereal in the bathroom, but you can move your hair dryer to the kitchen. This not meant to be a real-life example, but a strange instance to point out that it should live where YOU use it. Not where other’s determined it should live.
Stations include:
Coffee/Tea Station – placing mugs, coffee, tea, sugar/honey and filters all in a cabinet near the coffee machine.
Washing/chopping/prep – near a sink, with cutting boards, knives, containers or bowls, and a compost or trash can nearby
Cooking – near the stovetop and oven, with oils and spices, with pots and pans, and oven mitts
Food storage – whether storage containers or foil/plastic wrap/baggies for leftovers, or in the pantry and fridge
Cleaning – near the sink/dishwasher, have towels and cleaning supplies on hand and easily accessible
Step 3: Think Inside the Triangle
Chefs limit the number of steps taken each evening as not to burn out during meal service, and keep things flowing in the kitchen.
Chefs cannot be falling over or blocking each other, so making sure aisle ways are clear; they also clean up as they go, leaving only what they need or use regularly on the countertops.
The triangle is the key to efficiency and keeping stations close to the cook at all times, so everything is within reasonable reach.
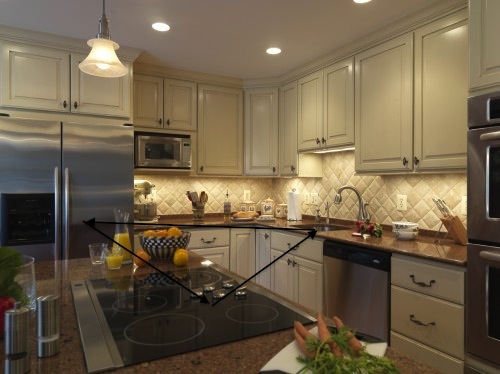
This example of a kitchen triangle comes from Case Kitchen Design in San Jose, CA: https://bit.ly/2Wyo92N
According to the National Kitchen and Bath Association, guidelines for kitchen triangles include:
-the sum of the triangle’s three sides should not exceed 26 feet and each leg should measure between 4 and 9 feet.
-it should not cut through an island or peninsula by more than 12 inches.
-if the kitchen only has one sink, it should be placed between or across from the cooking surface, preparation area, or refrigerator.
-no major traffic patterns should cross through the triangle.
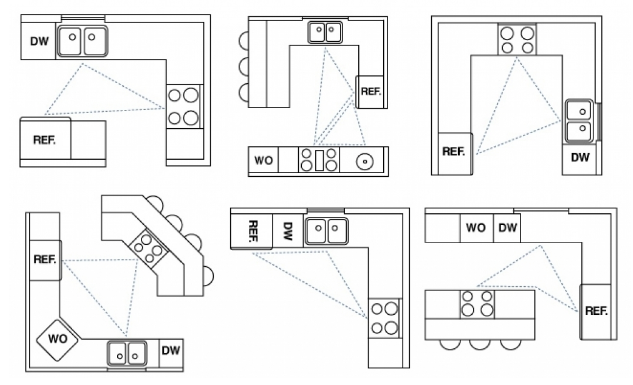
Examples of kitchen triangles courtesy of Interior Home Design Ideas: https://bit.ly/2VezrrD
Step 4: Placing Like with Like
Going back to that fork example, you want to place like items together where possible.
This is usually obvious:
-Dishes together, glassware together
-Pots/lids and pans together
-Cooking utensils together
-Food storage together
-Kids items together
-Spices and oils together
-Coffee and tea together
-Knives and cutting boards together
-Baking items/measuring bowls/spoons/cups together
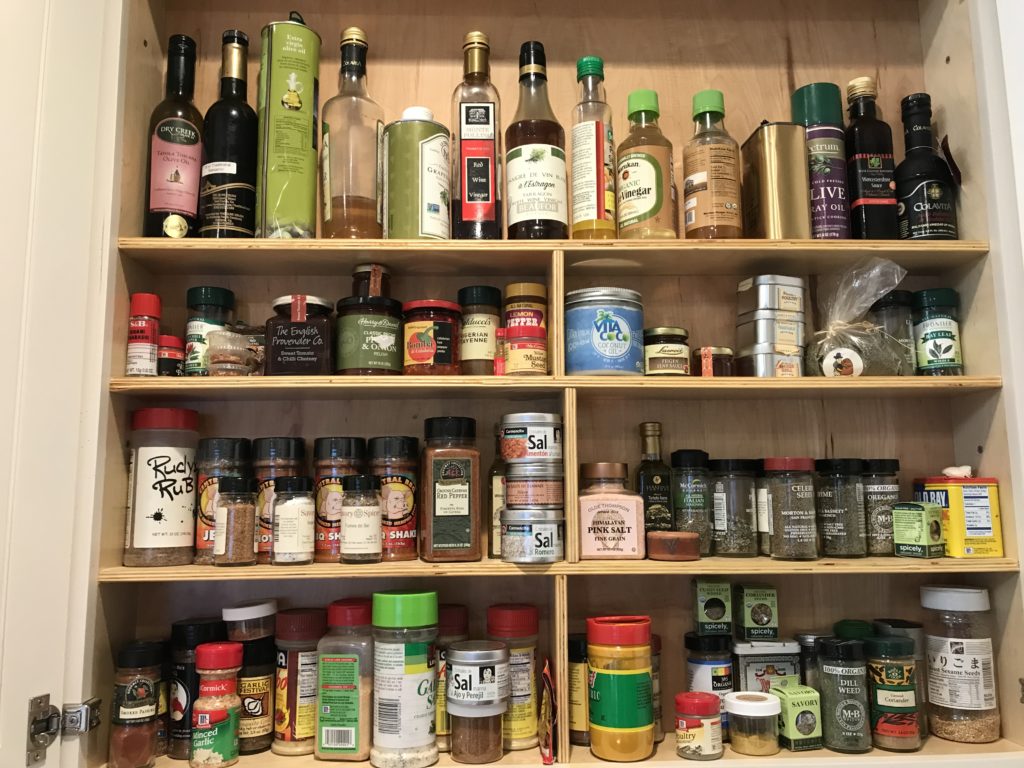
But know that organizing is not one-size-fits-all (if i had a dollar for every time I said that…). For example, there are numerous ways to organize your spices:
-alphabetically
-by type or category (green vs. spicy vs. salt/pepper vs. earthy)
-by the ones you use the most often
-in a drawer laying down
-in a deep drawer with just lids showing
-in a cabinet
-on a countertop
-in a lazy susan
-in a tiered organizer
-on the fridge (magnets)
(on a train, on a plane, in the rain – I feel like Dr. Seuss a little)
Step 5: A-B-C Space
Typically organizing is broken up into A, B, C and D spaces.
A (priority) – is anything that is within arm reach.
B (secondary) – is just out of reach with some effort in play.
C (seasonal) – is when you are bending over or having to get on a ladder/step stool.
D (annual) – is usually stored out of that room (offsite storage, garage storage, etc.).
Your “A” space is your primary real estate; it’s reserved for the items you use most often. It follows the same principal of the work triangle: minimal steps, maximum efficiency.
“B” items are not used as often but still on a more regular basis and you should have relatively easy access to.
Items you use once a month or once a quarter can be put in the “C” spaces.
Items you use once a year (holiday items, fondue pot, party/catering items) you put in “C” or even “D” spaces.
Remember this will depend on the height of the people using the kitchen.
Consider Your Space:
-use cabinet hooks for pot lids
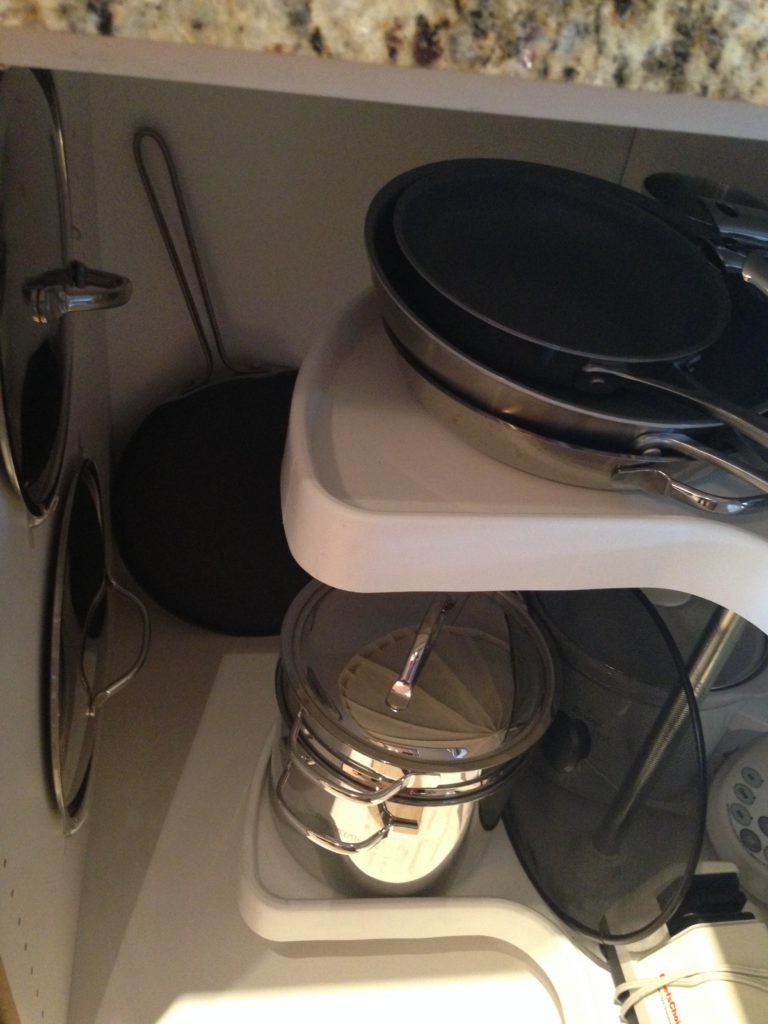
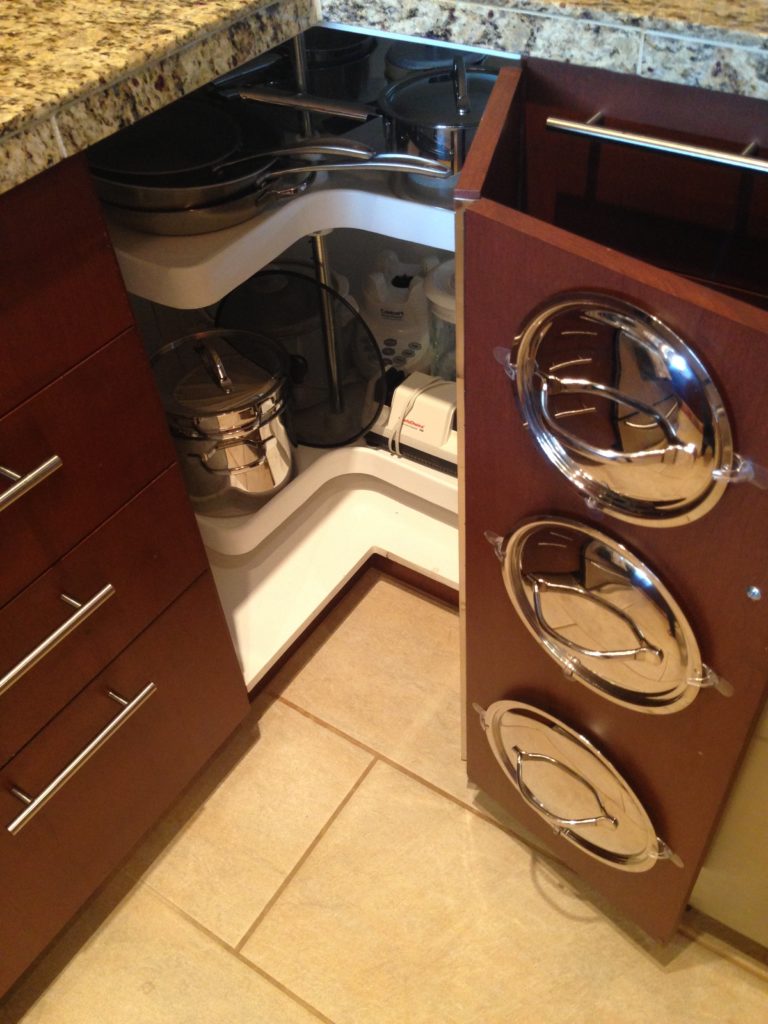 -lazy susans in cabinets are best for pots, pans and small appliances
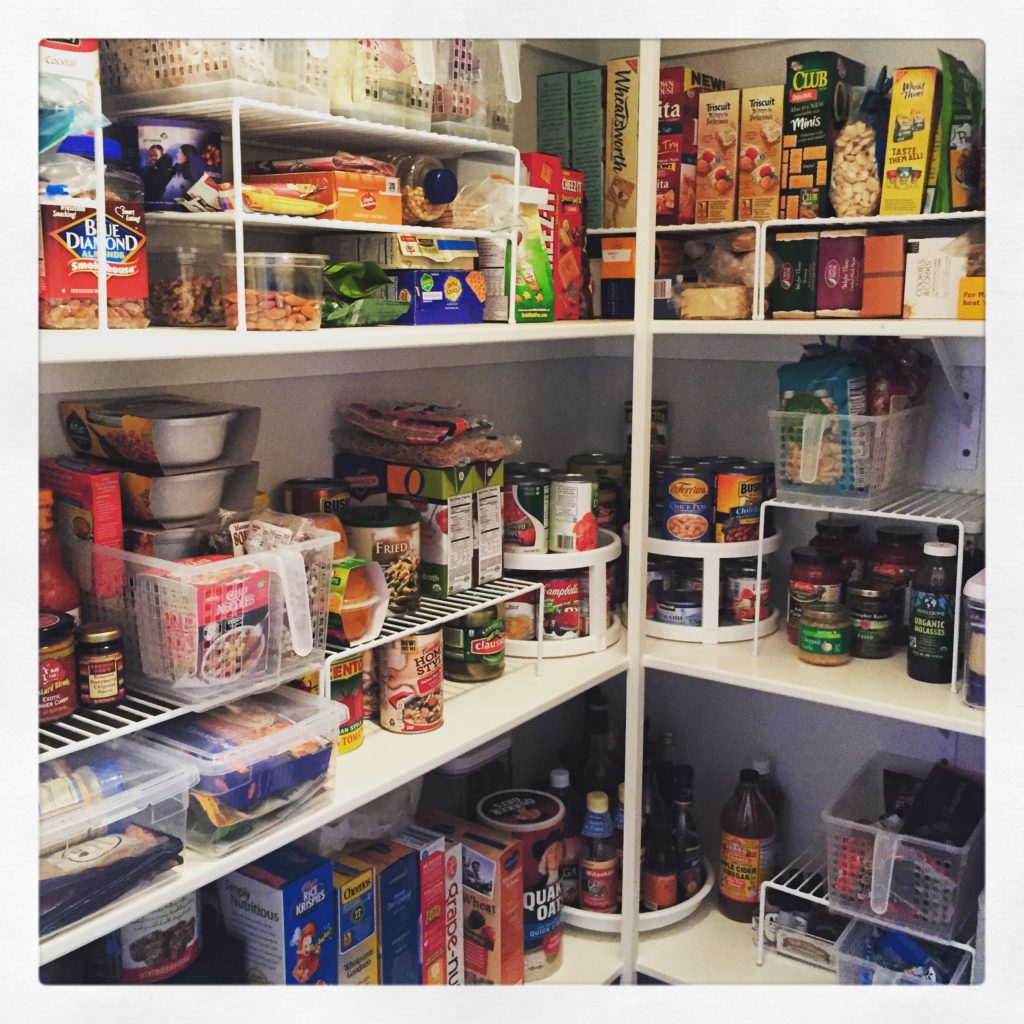
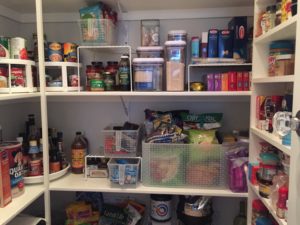
 -sort pantry items into categories and use lazy susans, especially in corner cabinets
 -you can use pot lid organizers for food storage lids
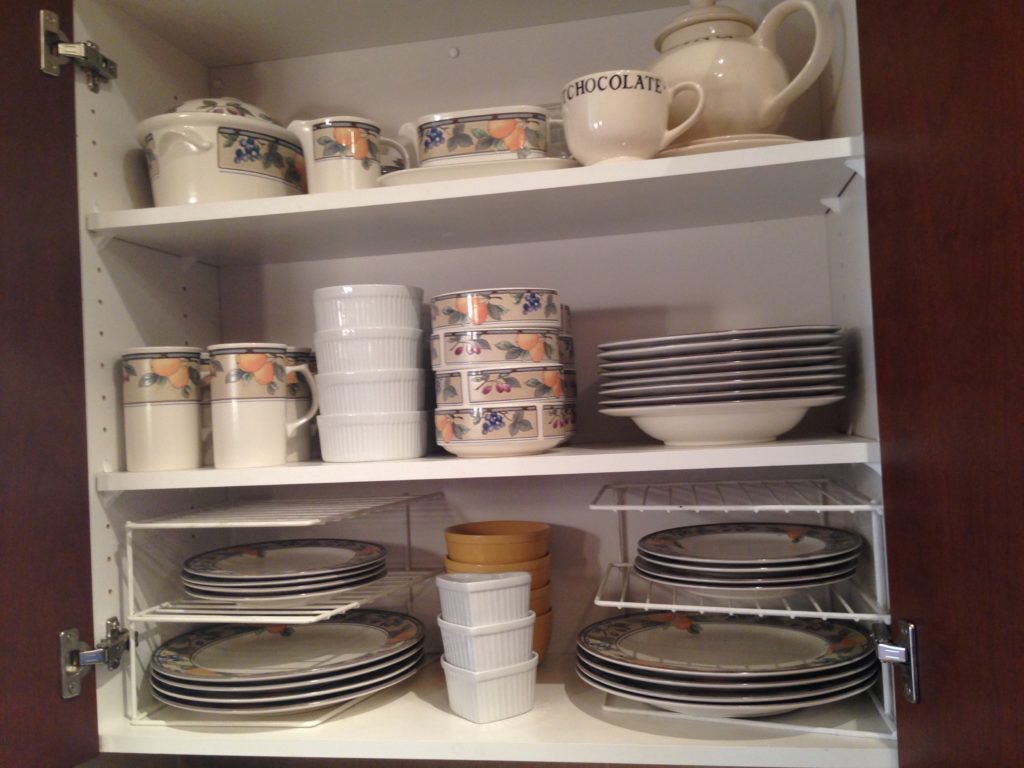
 -use shelf risers for plates, bowls, mugs and glassware
 -use organizers to access vertical space; use organizers that hang over cabinet doors
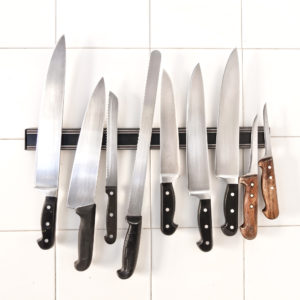
 -how about a magnetic strip to hold/organize your knives (provided it’s out of reach of children and you like this look)
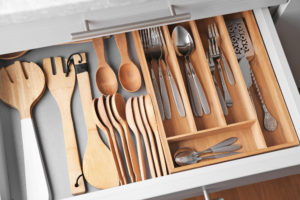
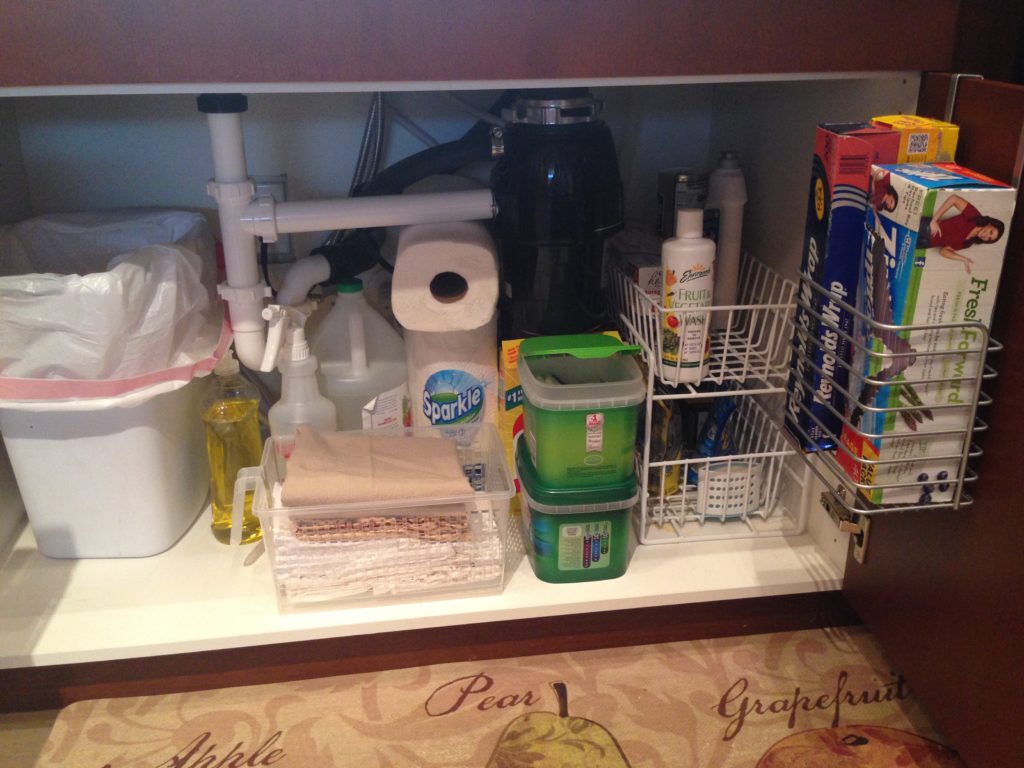
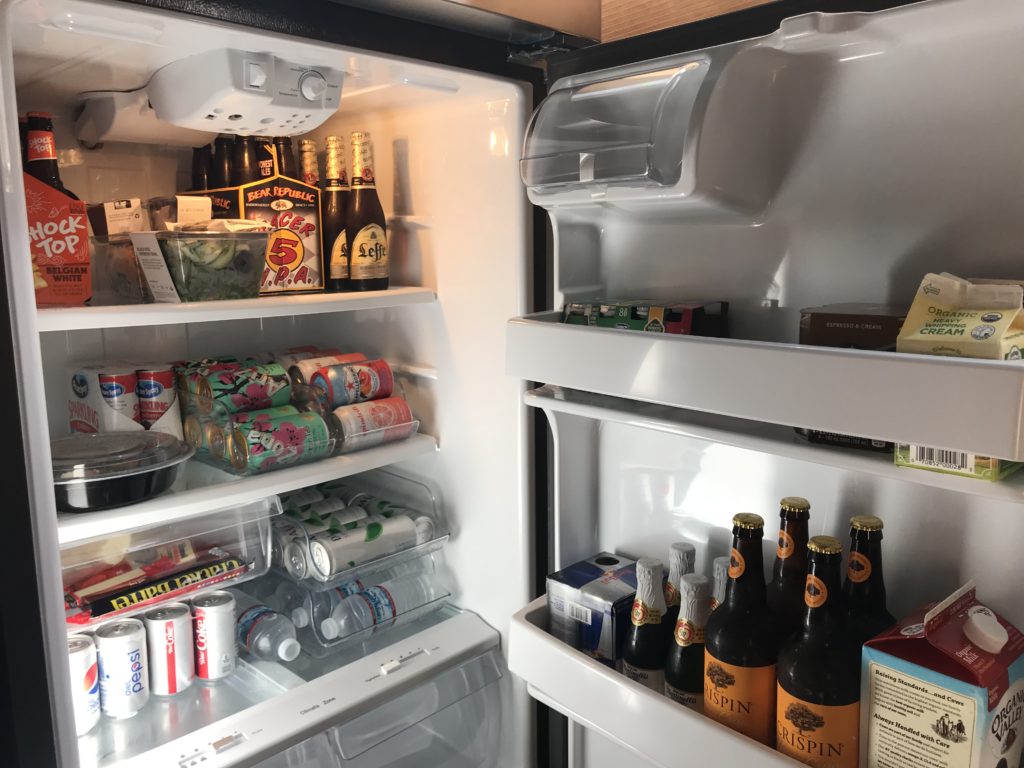
 -drawer organizers are key in helping you easily find all your cooking gadgets -use clear bins in your fridge and freezer, and even your pantry
 -lazy susans, shelf risers, baskets and bins are also helpful in categorizing and corralling your food in the pantry
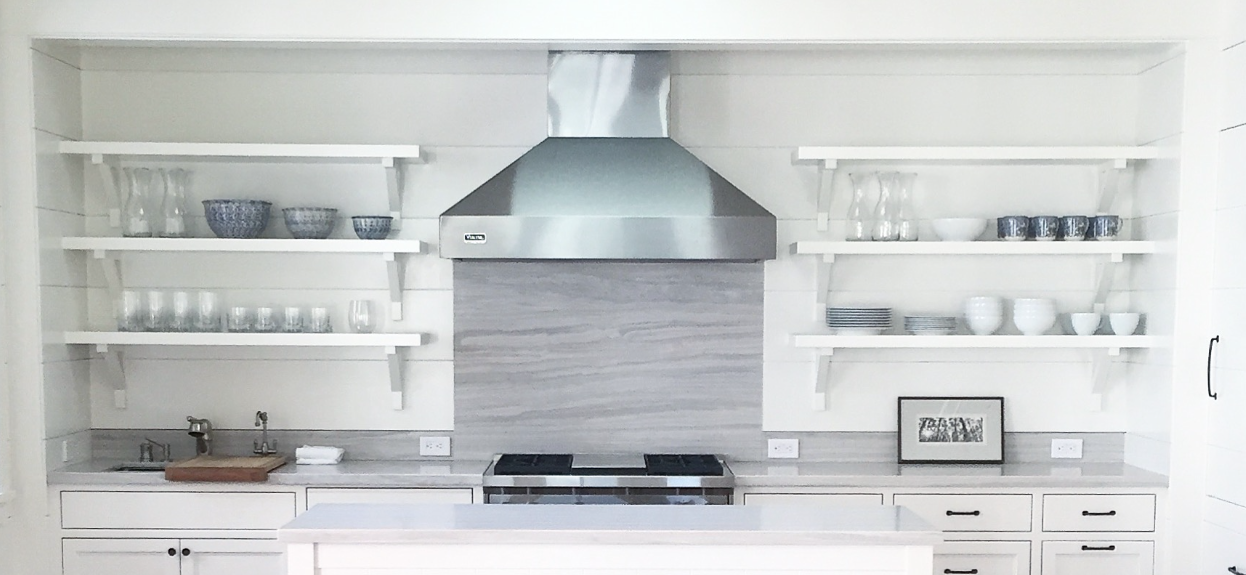
This was one of my favorite kitchens to organize. Of all the spaces I’ve done this one looks like a magazine ad! This is actually a guest house that belongs to a client of mine.
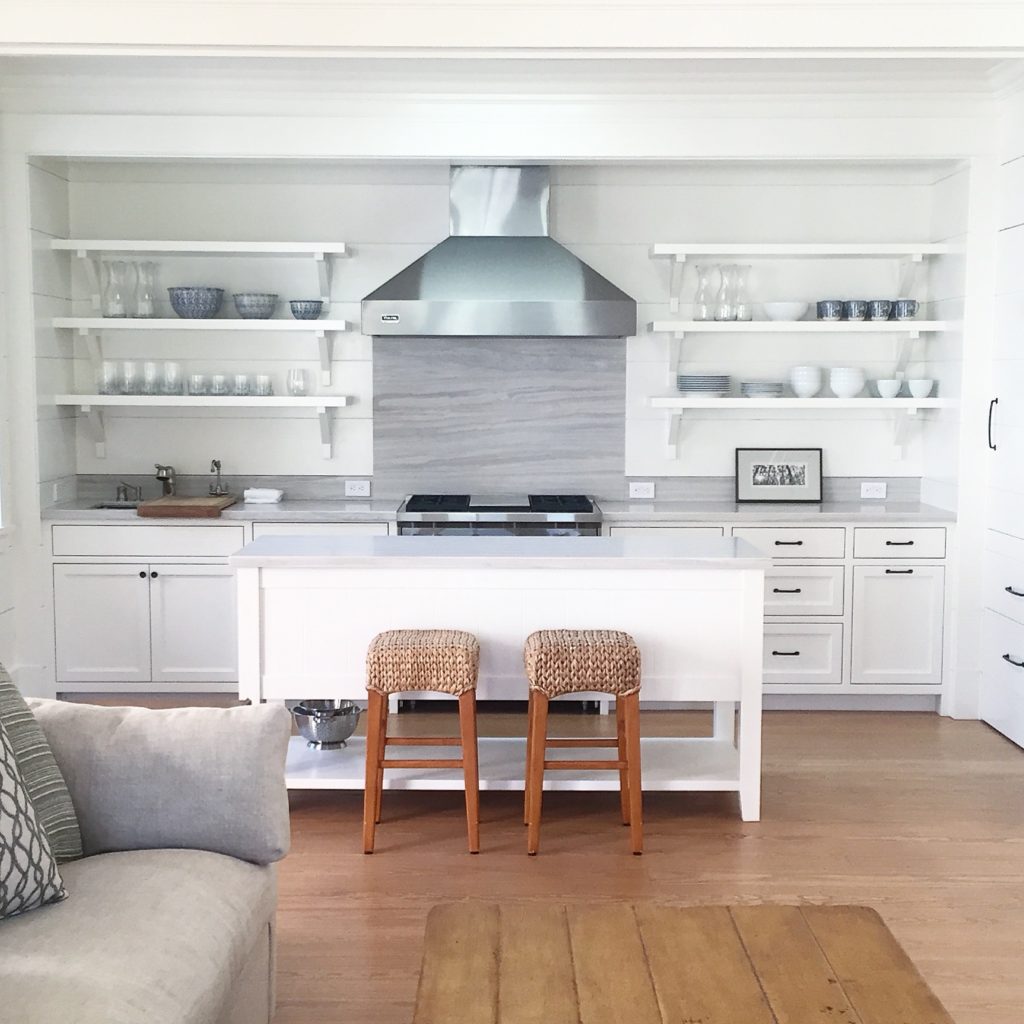 I love the open shelving, but it’s not for everyone. Sometimes cabinets are good because they hide the clutter.
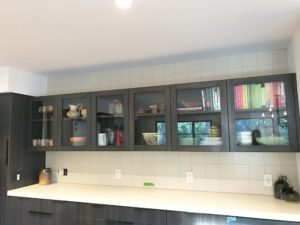
Here’s another example of open shelving or glass cabinets:

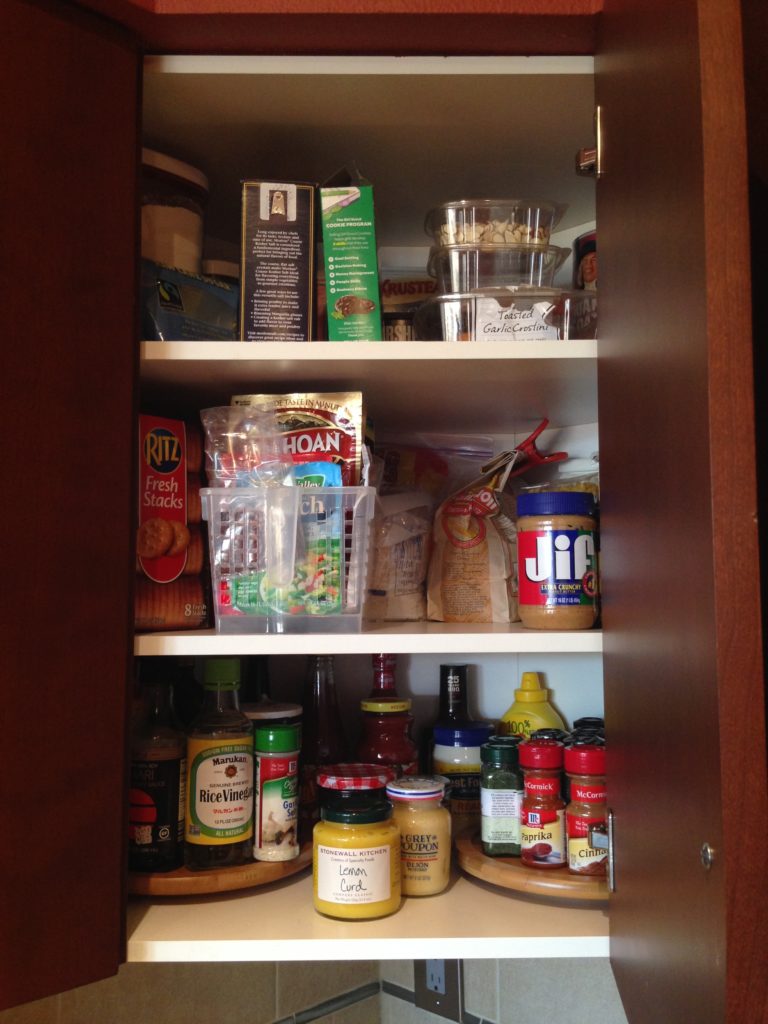
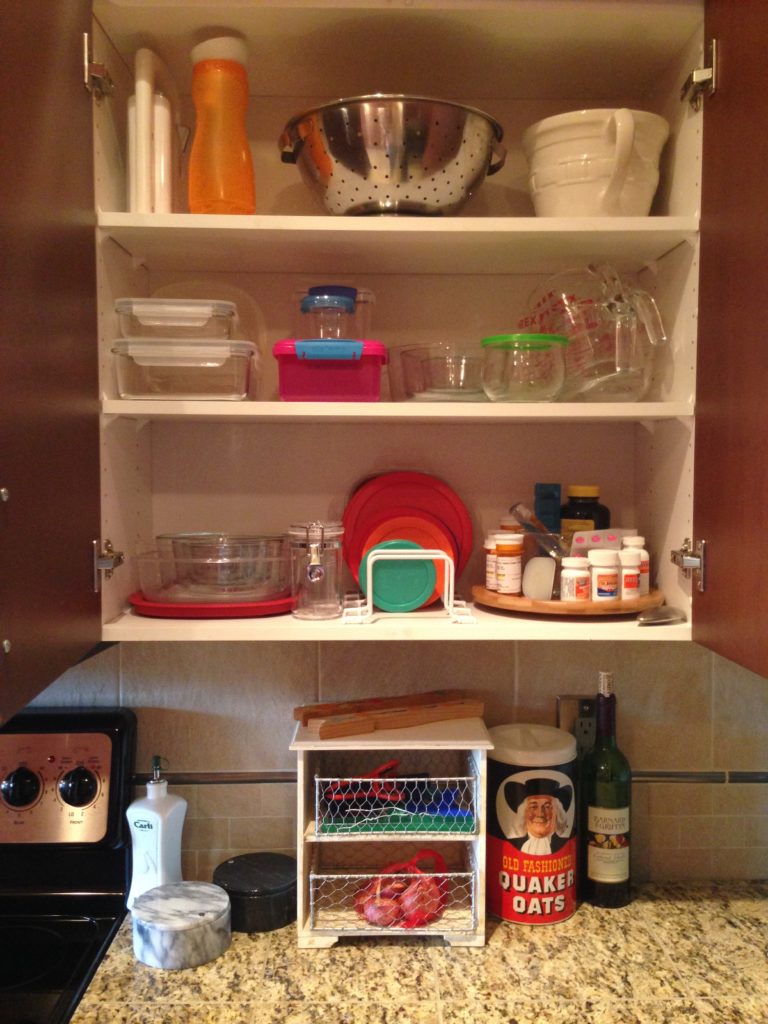
Step 6: Clear the Clutter
Since the kitchen is the heart of the home and often a multi-purpose room, other categories naturally end up here:
-command centers
-mail sorting
-homework stations
-coupons, gift cards, event tickets, invitations
-pet items
If you can’t relocate these, by all means keep in the kitchen but give proper thought to where to store these categories and if they’d be better suited for another area of the house. I also recommend getting rid of duplicates or items with missing/mismatched lids. For example I once worked in a home where they had 9 wine corkscrews. I can understand keeping 4 or even 5 (some are very different; people have their favorites; different corkscrews are used to open different size/format bottles) but 9 was excessive, and so they cut it down by half. Everyone has a favorite can opener or peeler, but if you have 3-4, donate some and keep your favorite plus a backup (or place extras with the emergency or camping supplies; send off to your kids at college).
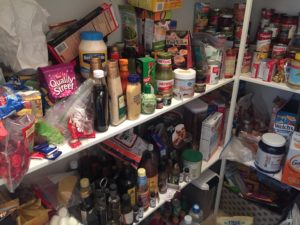
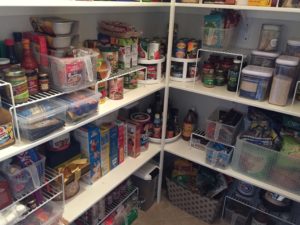
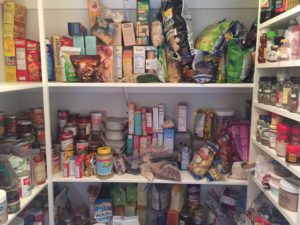
Also, be wary of overbuying food and aim to review your pantry quarterly or even two times a year. The reasoning behind this: new food gets placed in front, and so you forget about the food in the way back. You could try adopting the grocery store mentality of putting all new items in the back and the older food towards the front so you use it, or marking the food you need to eat immediately before it expires (sharpie; stickers).
Clearing the clutter is an ongoing process (as I mentioned before, try to clean as you go). If you notice a gadget is broken or not used often, move it on (fit it, to the trash or donation pile, respectively). Aim to streamline gadgets and small appliances where possible. For example, do you need an avocado tool (cuts, slices, removes the pit), when a knife will do? It’s a personal decision, and for me, I chose the knife, despite that tool being mighty handy.
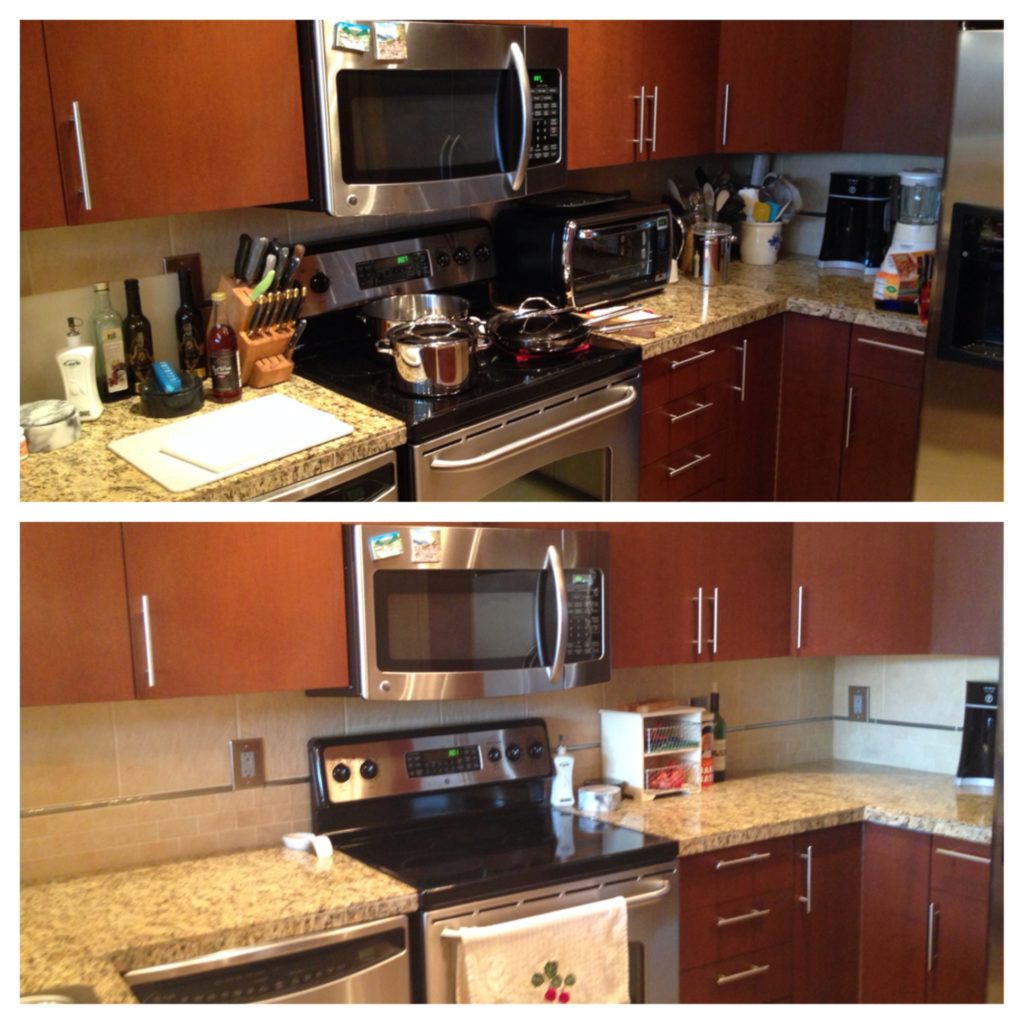
Clutter is visual noise:
Before vs. After
Before vs. After
Before vs. After
In summary, the six steps are as follows:
1. Maximize Efficiency
2. Organize into Stations
3. Think Inside the Triangle
4. Place Like with Like
5. Consider A-B-C Spaces
6. Clear the Clutter
With the kitchen acting as the heart of the home we want to keep those arteries moving and unclogged with clutter as much as possible. Doing so also helps cut down on clutter which acts as visual noise for many people. With systems in place, you can easily tidy the kitchen so that when impromptu guests come over, you don’t have to agonize over “the mess” or being judged. Rather you can focus on quality time with your friends and family.
What steps will you implement today to make your kitchen more efficient or organized? If you’ve organized your own kitchen, hired a professional organizer to help, or are a professional chef, what steps have you done that you want to share with us in the comments? Have a particularly challenging kitchen question? Don’t hesitate to contact me – I love to be helpful.


Teresa James, CPO with Organize and Stage Your Home
Posted at 01:21h, 15 FebruaryStore dishes and glasses near the dishwasher to make unloading the dishwasher easier. Or store next to table to make sitting the table easier. In other word, store where easily accessible depending upon functions/tasks are frequent..
Lauren Mang
Posted at 04:26h, 18 FebruaryGreat advice! Thanks Teresa.